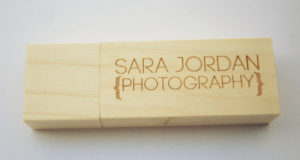
How to Transfer Your Photos on a PC
*WARNING ONCE YOU START TRANSFERING PHOTOS, DO NOT TAKE THE DRIVE OUT OF THE COMPUTER UNTIL THE PROCESS IS DONE. OTHERWISE, YOU MAY CORRUPT THE FILES.
Step 1: Insert your flash drive into your computer’s USB port.
Step 2: You may be presented with a window open that says “Auto Play”
If this is the case, simply click on “Open folder to view files”. If you don’t have this window automatically open, open “My Computer”, locate and double-click on the appropriate device to open. Most flash drives will be labeled as a Removable Disk (see image below), but some will be labeled as a hard drive. If you have troubles locating your device, remove the flash drive from your computer, open “My Computer” and take note of the drives and devices already there, then reinsert your flash drive into the USB port and watch for a new device to appear. Take note of the name Windows uses to label the flash drive, Removable Disk (F:), for example. Double-click to open.
Step 3: Open the location of the photos and/or folders you wish to transfer to the other computer.
Step 4: Select the photos and/or folders. To select multiple images or folders, hold down the Ctrl key while making your selections.
Step 5: Right-click on your selection, choose “Send To” and then the appropriate destination (in my case, Removable Disk (F:). Alternatively, you can drag-and-drop your photos or folders into the opened flash drive folder, so long as both windows are seen on your computer’s monitor.
Step 6: Once your files have been moved over to the flash drive, click on the “Safely Remove Hardware” icon located in the notification area (bottom right corner of your computer’s monitor).
Select the device and click “Stop”. You may have another window open asking you to confirm which devices to stop.
Select the device from the list and click “OK”. You’ll then be prompted that it is safe to remove the device.
Select the device from the list and click “OK”. You’ll then be prompted that it is safe to remove the device.
Step 7: Plug the flash drive into the USB port of the computer you want your photos on. Open the flash drive folder (as described in step 2), click on one of the images/folders and then click Ctrl + A to select all. Now, either drag-and-drop your folders onto your desktop or right-click and choose “copy”. If you like, select “cut” rather than “copy and once you complete step 8, your photos will no longer be on your flash drive.
Step 8: Navigate to the location you want your photos copied to, right-click and choose “paste”.
You have now transferred your photos from one computer to another using a flash drive! If you have yet to purchase a flash drive, keep in mind that they come in a variety of storage sizes. Obviously, the more a flash drive can hold, the more costly it will be. You don’t necessarily need to purchase the flash drive with the largest storage. Depending on how many photos you’re transferring, a smaller flash drive simply means you’ll need to repeat these steps a few times to get all your images moved over.

How to Transfer Your Photos on a MAC
*WARNING ONCE YOU START TRANSFERING PHOTOS, DO NOT TAKE THE DRIVE OUT OF THE COMPUTER UNTIL THE PROCESS IS DONE. OTHERWISE, YOU MAY CORRUPT THE FILES.
Step 1
Connect the memory stick in an available USB port on your Mac. If using the memory stick for the first time, your Mac will install the necessary driver software. A USB icon will appear on your Mac display.
Step 2
Double click the icon. You can also Click “Finder” to open the Finder window and choose the USB icon under Devices. The contents of the memory stick will display in a separate window.
Step 3
Save open documents or software to your memory stick by clicking the USB icon and clicking “Save.” You can also click and drag an open document or program to the USB icon and selecting “Save.”
Step 4
Click the file you want to view or the software you want to open and click “Open.” Your software will open and the file will open in its default program. Properly remove your memory stick from your Mac by clicking the USB icon and selecting “Eject” from the File menu. You can also click “Finder” and click the upward-pointing arrow to eject the memory stick from your Mac.
You may download this document by clicking here using-a-thumbdrive-flash-drive
Sara Jordan Photography
info@sarajordanphotography.com